
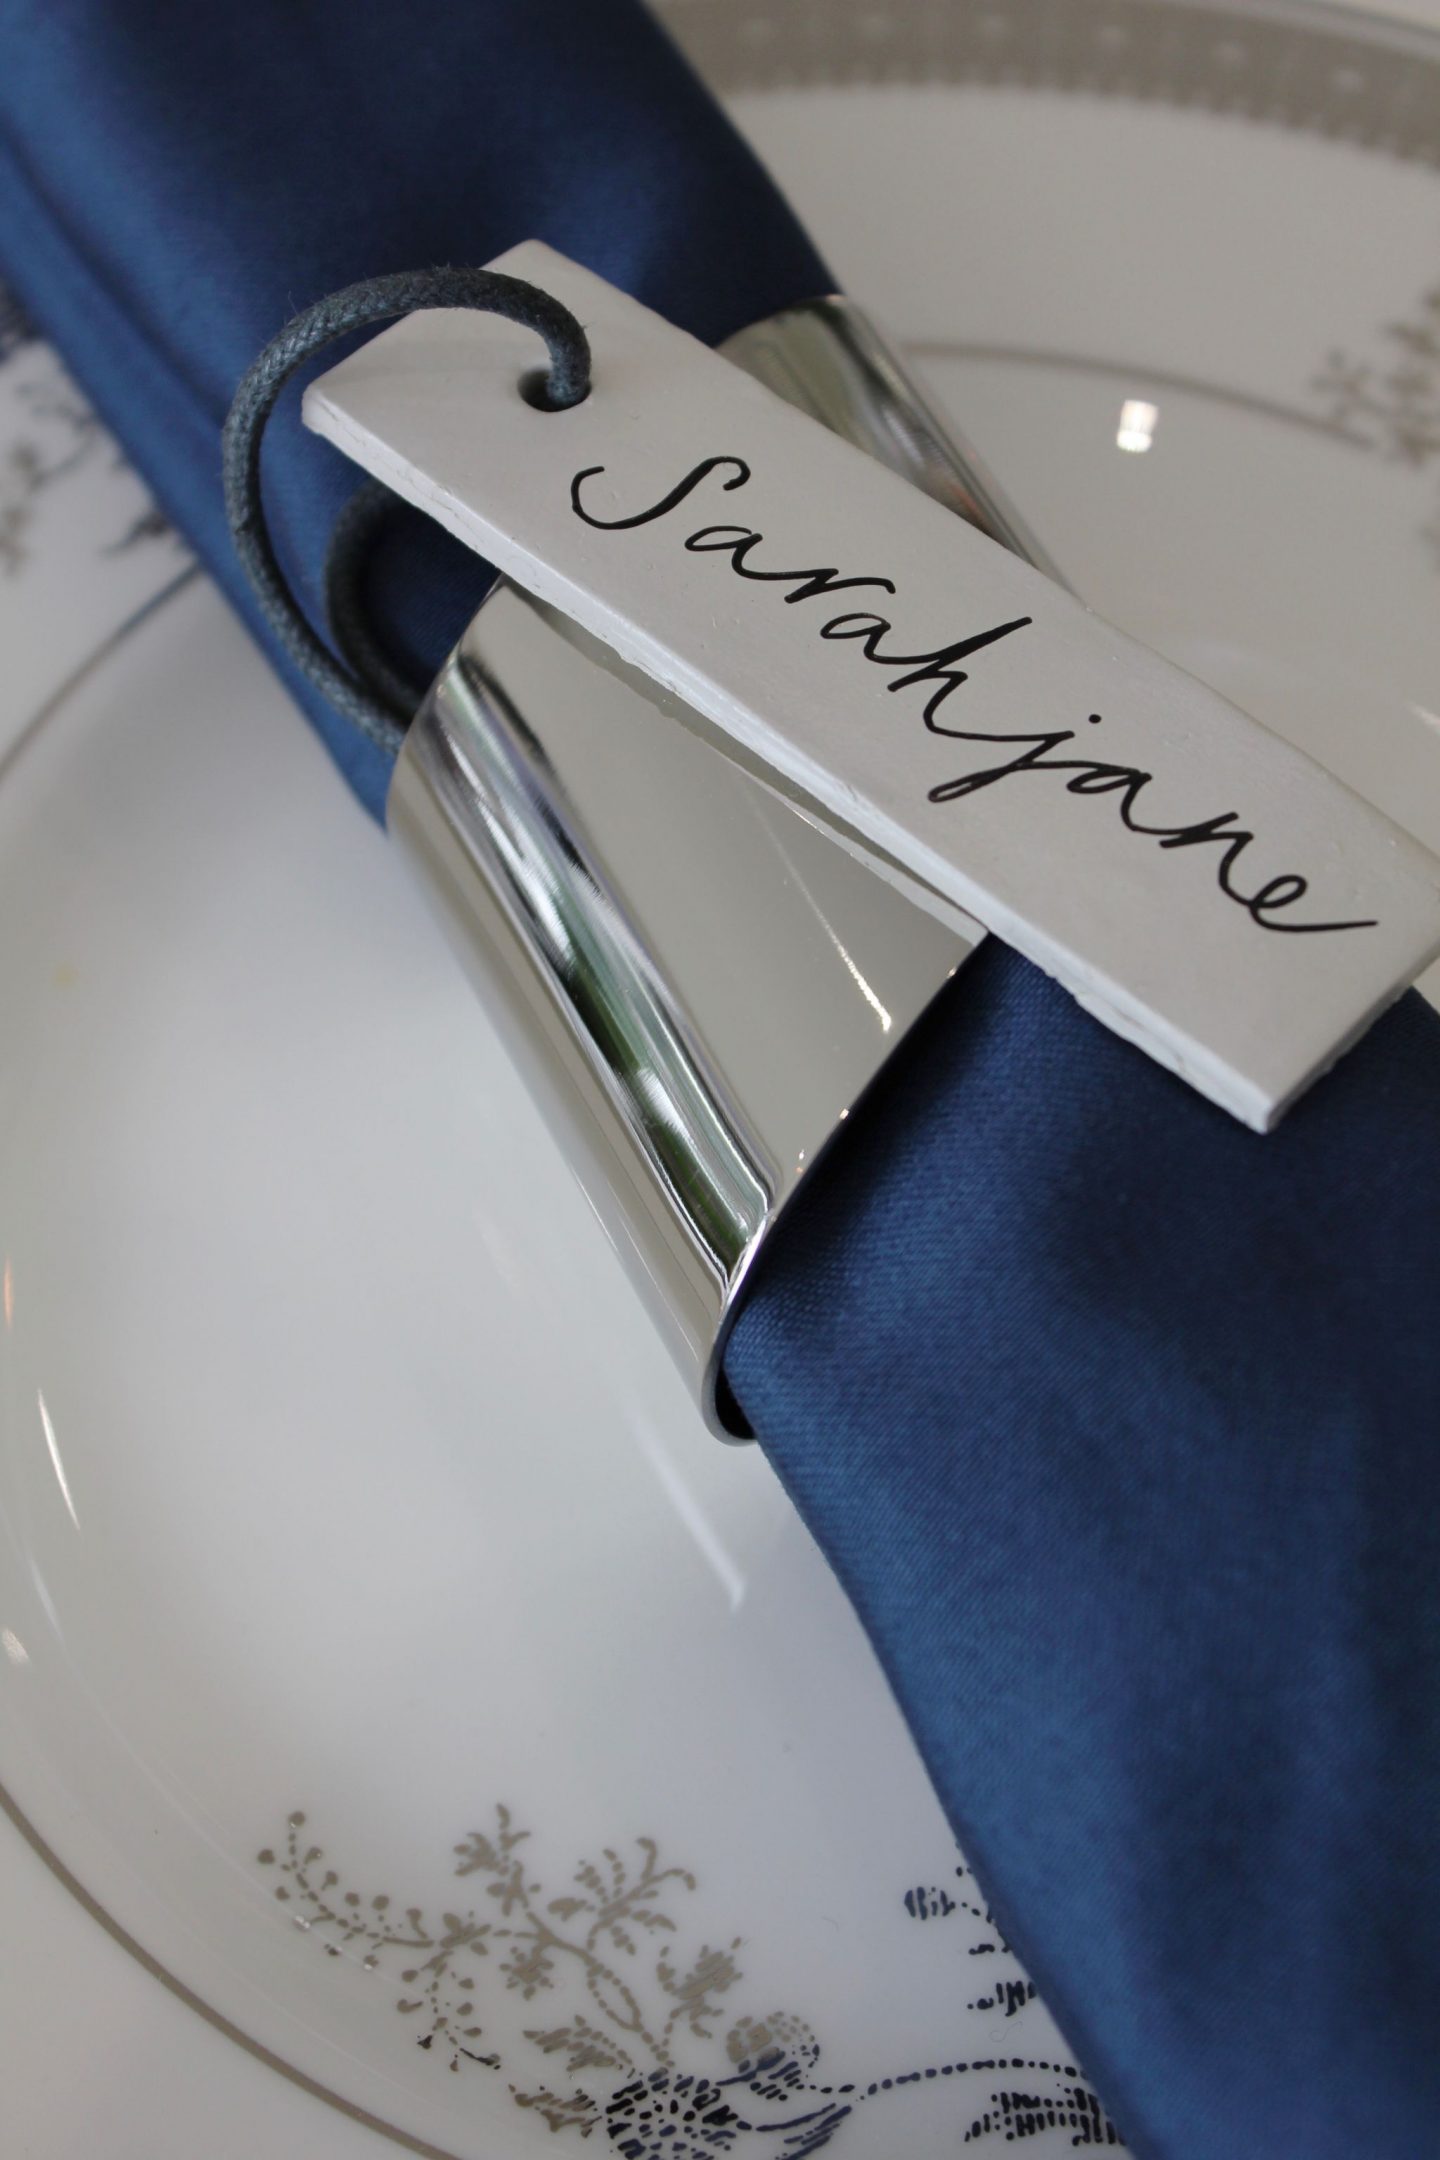
Following on from my recent IGTV on how to create your own luggage-style DIY place settings, I have listed below the products I used and a step by step guide…
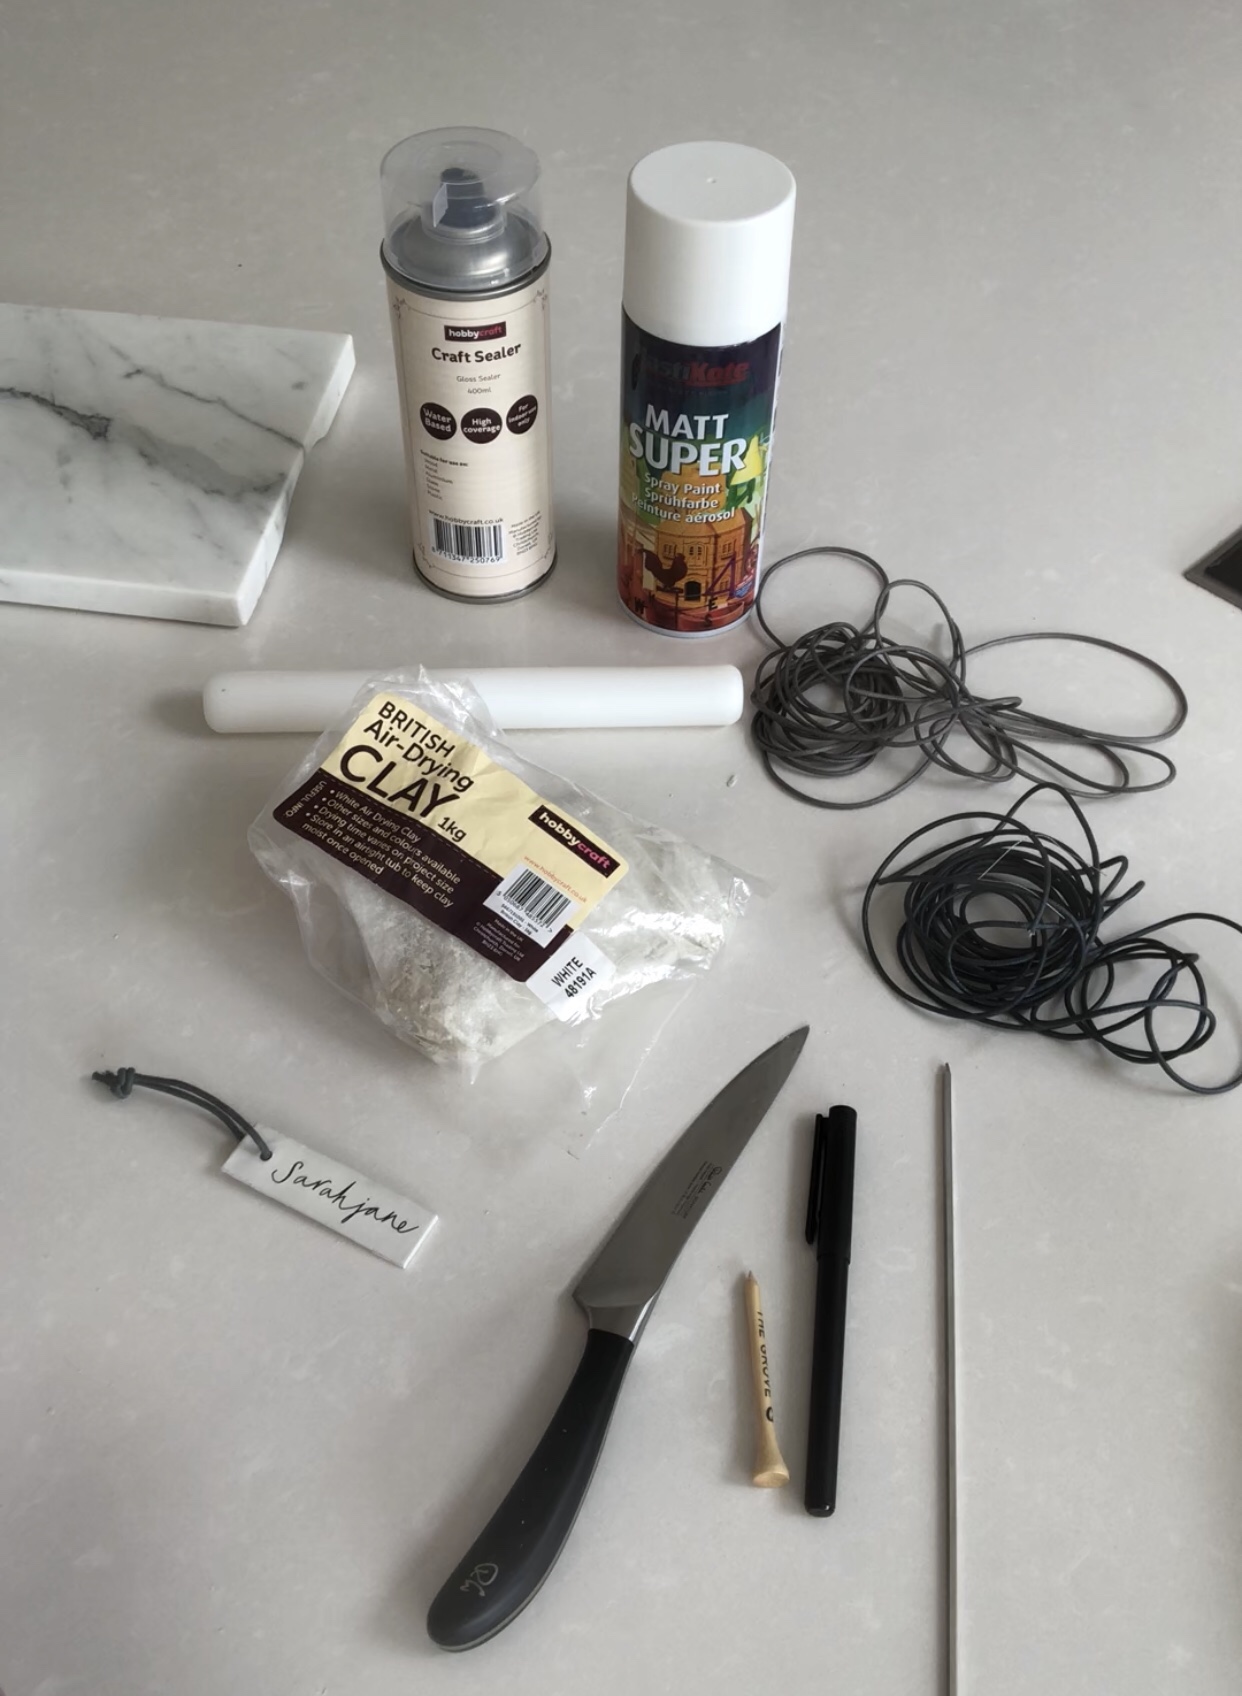
You will need:
- Air Drying Clay – I bought a 1kg bag from Hobbycraft for £3.75 and this is enough for +70 tags
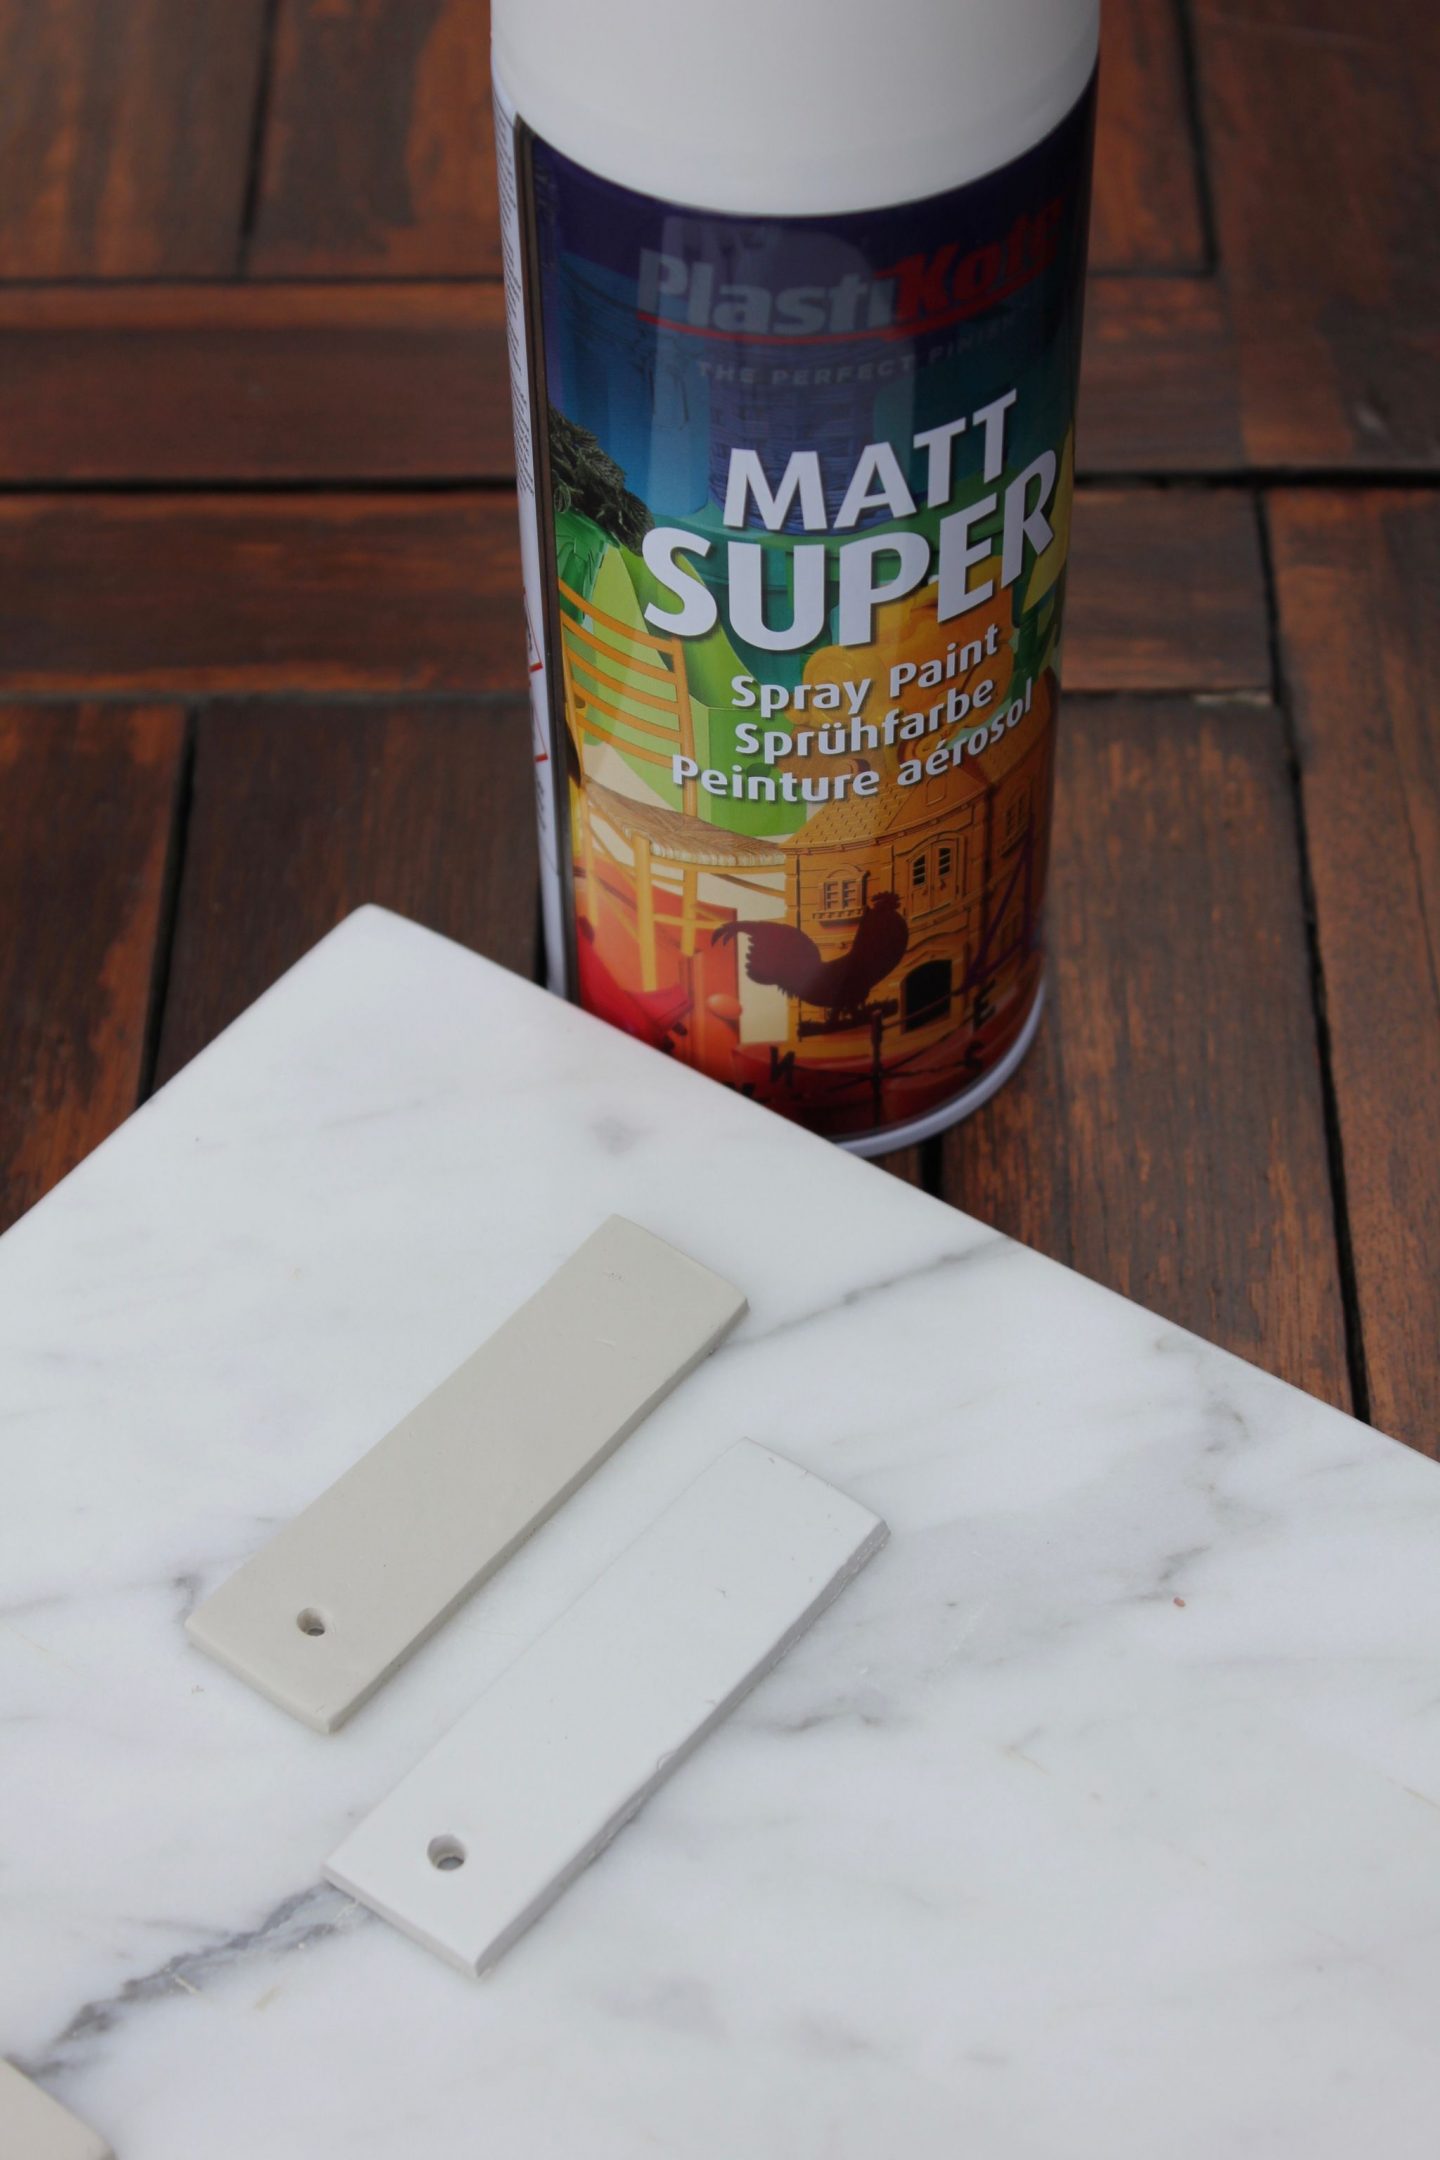
- White Matt Spray – Amazon (only required if you want pure white tags)
- Craft Sealer – Hobbycraft, although I can’t find online
- Grey and blue cord 49p a metre (I used both) – Hobbycraft, although I can’t find online. I will say, you could use any type of ribbon, cord, string
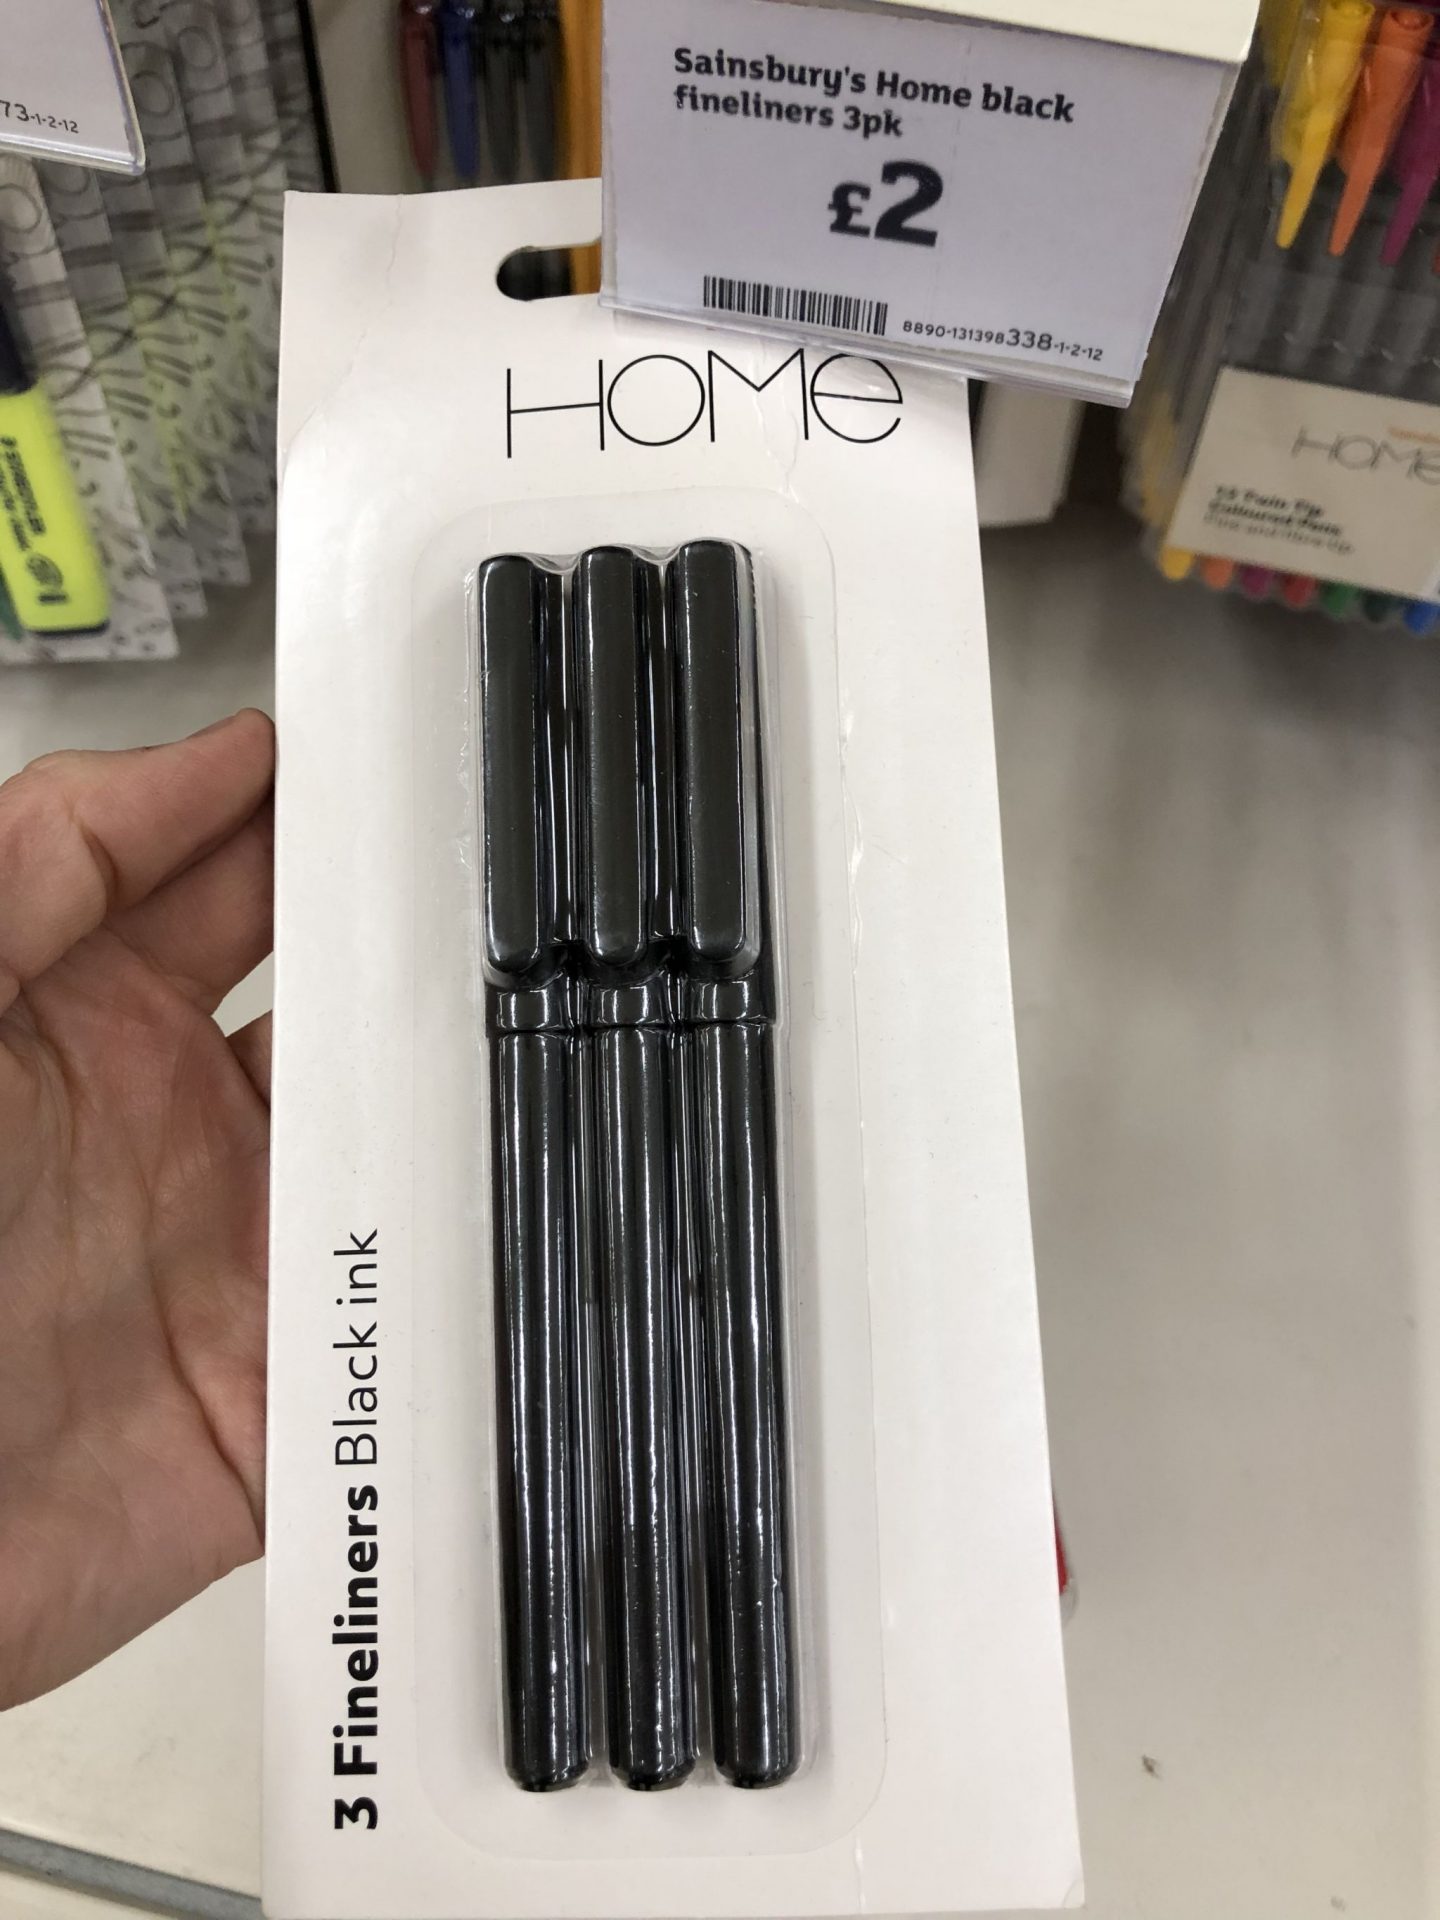
- Black Fineliner – I bought a 3 pack of pens from Sainsbury’s. I found that they write better when the white matt spray on the tags is nearly dry as opposed to completely dry
- An Air-Ball pen works well if the tags are completely dry – also from Sainsbury’s
- Marble board Blonde and Stone
- Fondant Rolling pin – John Lewis
- A small round skewer – I used a BBQ skewer
- Long sharp knife
Method
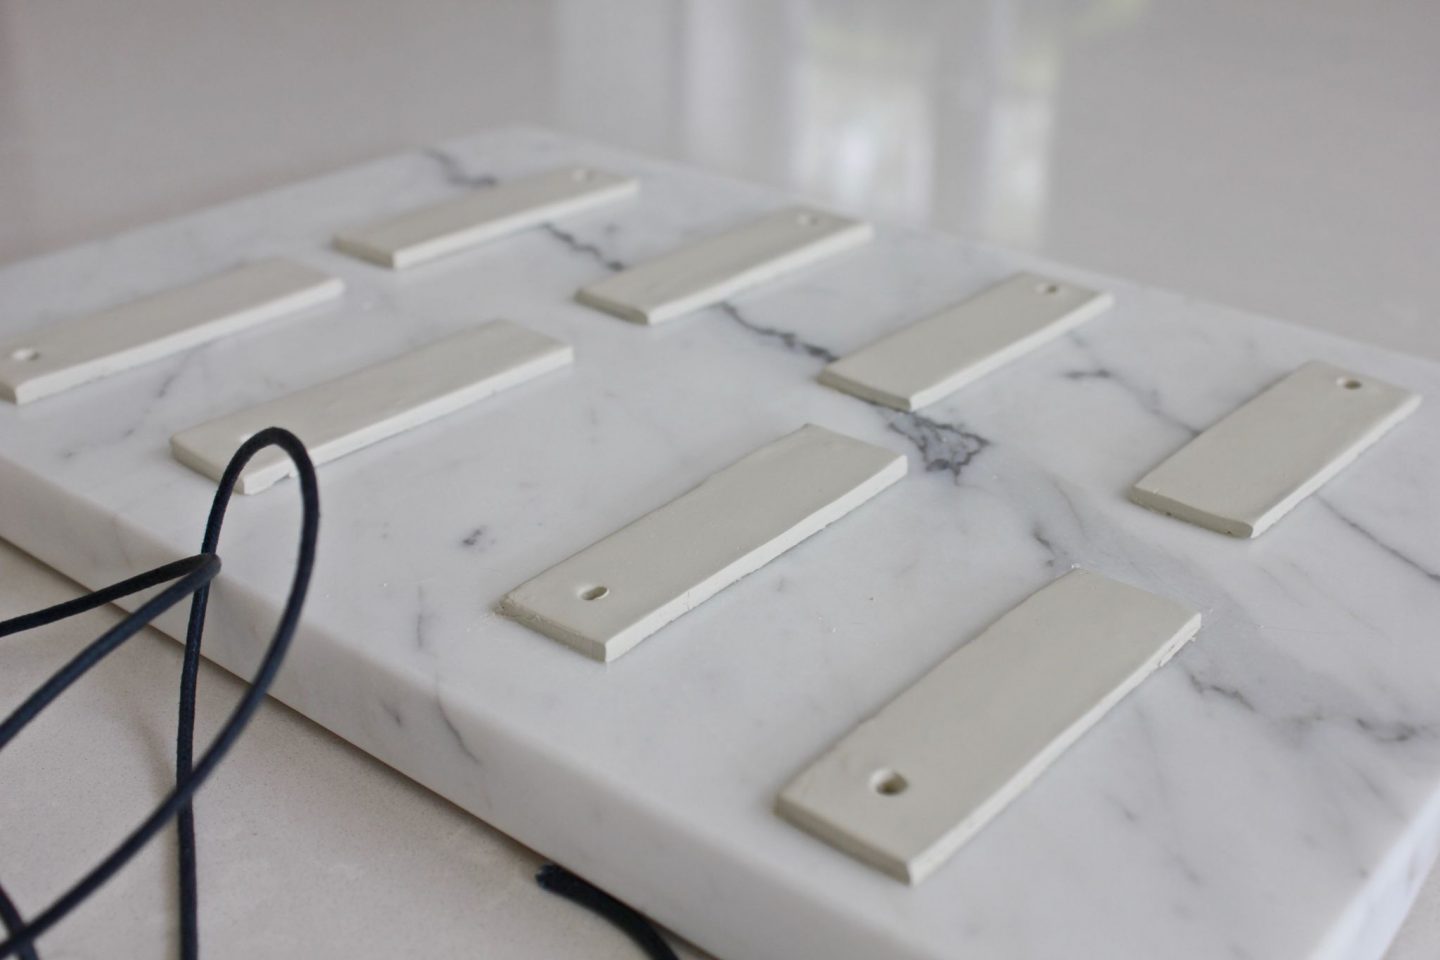
To begin, tear a section from your air drying clay block and roll it out into a flat surface of roughly 3mm thickness. Then, using your long sharp knife cut out the shape of your luggage tag, mine were approximately 8cm long and 2.5cm wide.
One thing to highlight – keep the amount you touch the clay to an absolute minimum as I found it marks very easily! Always use your knife to shape and lift your clay.
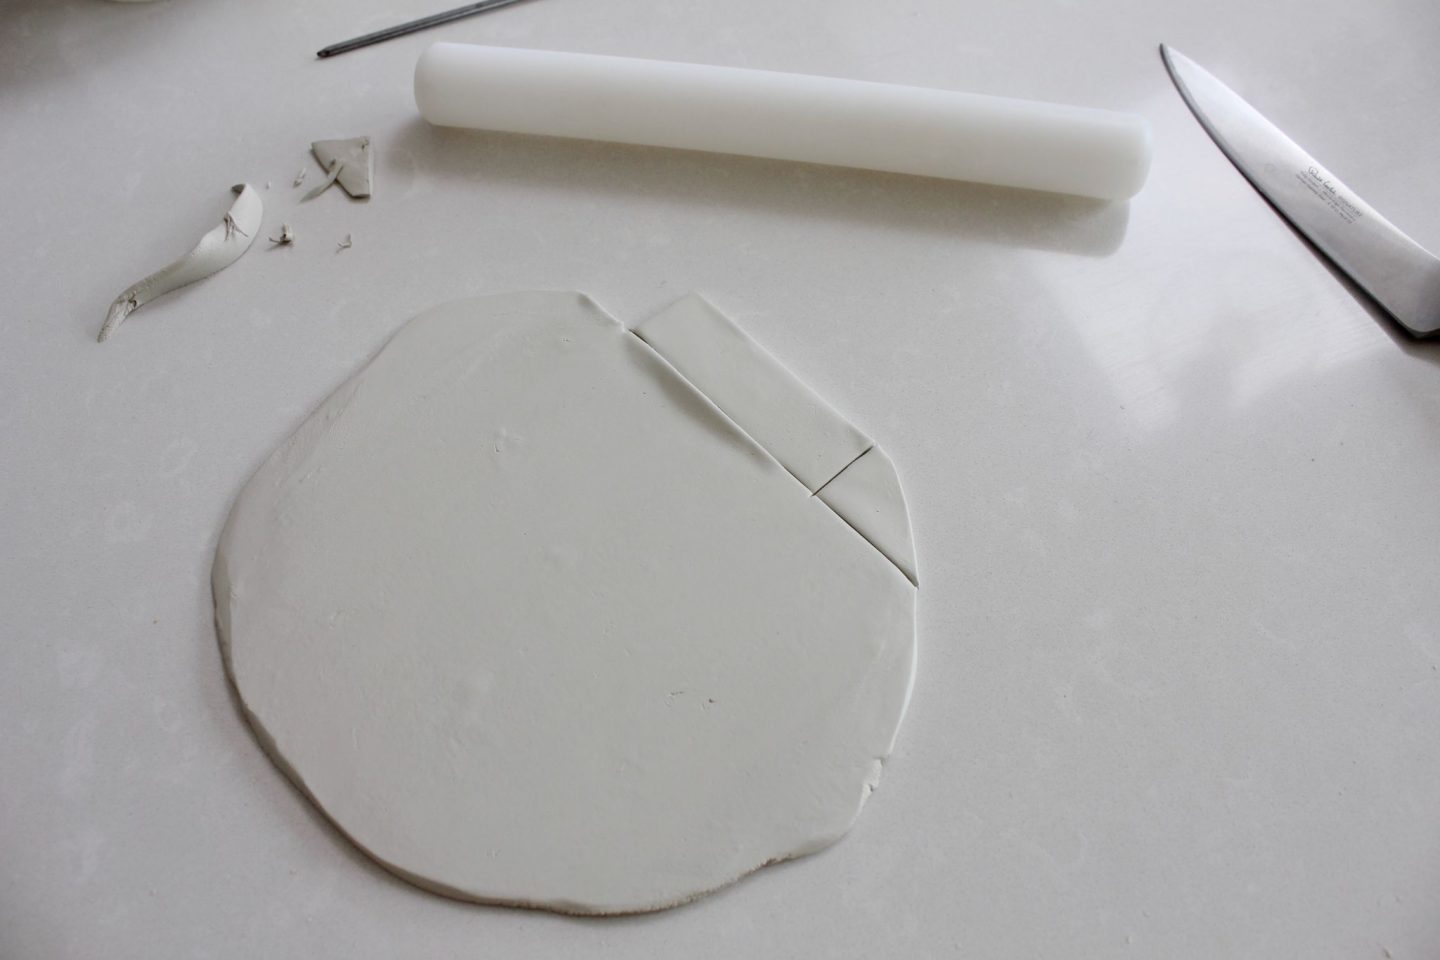
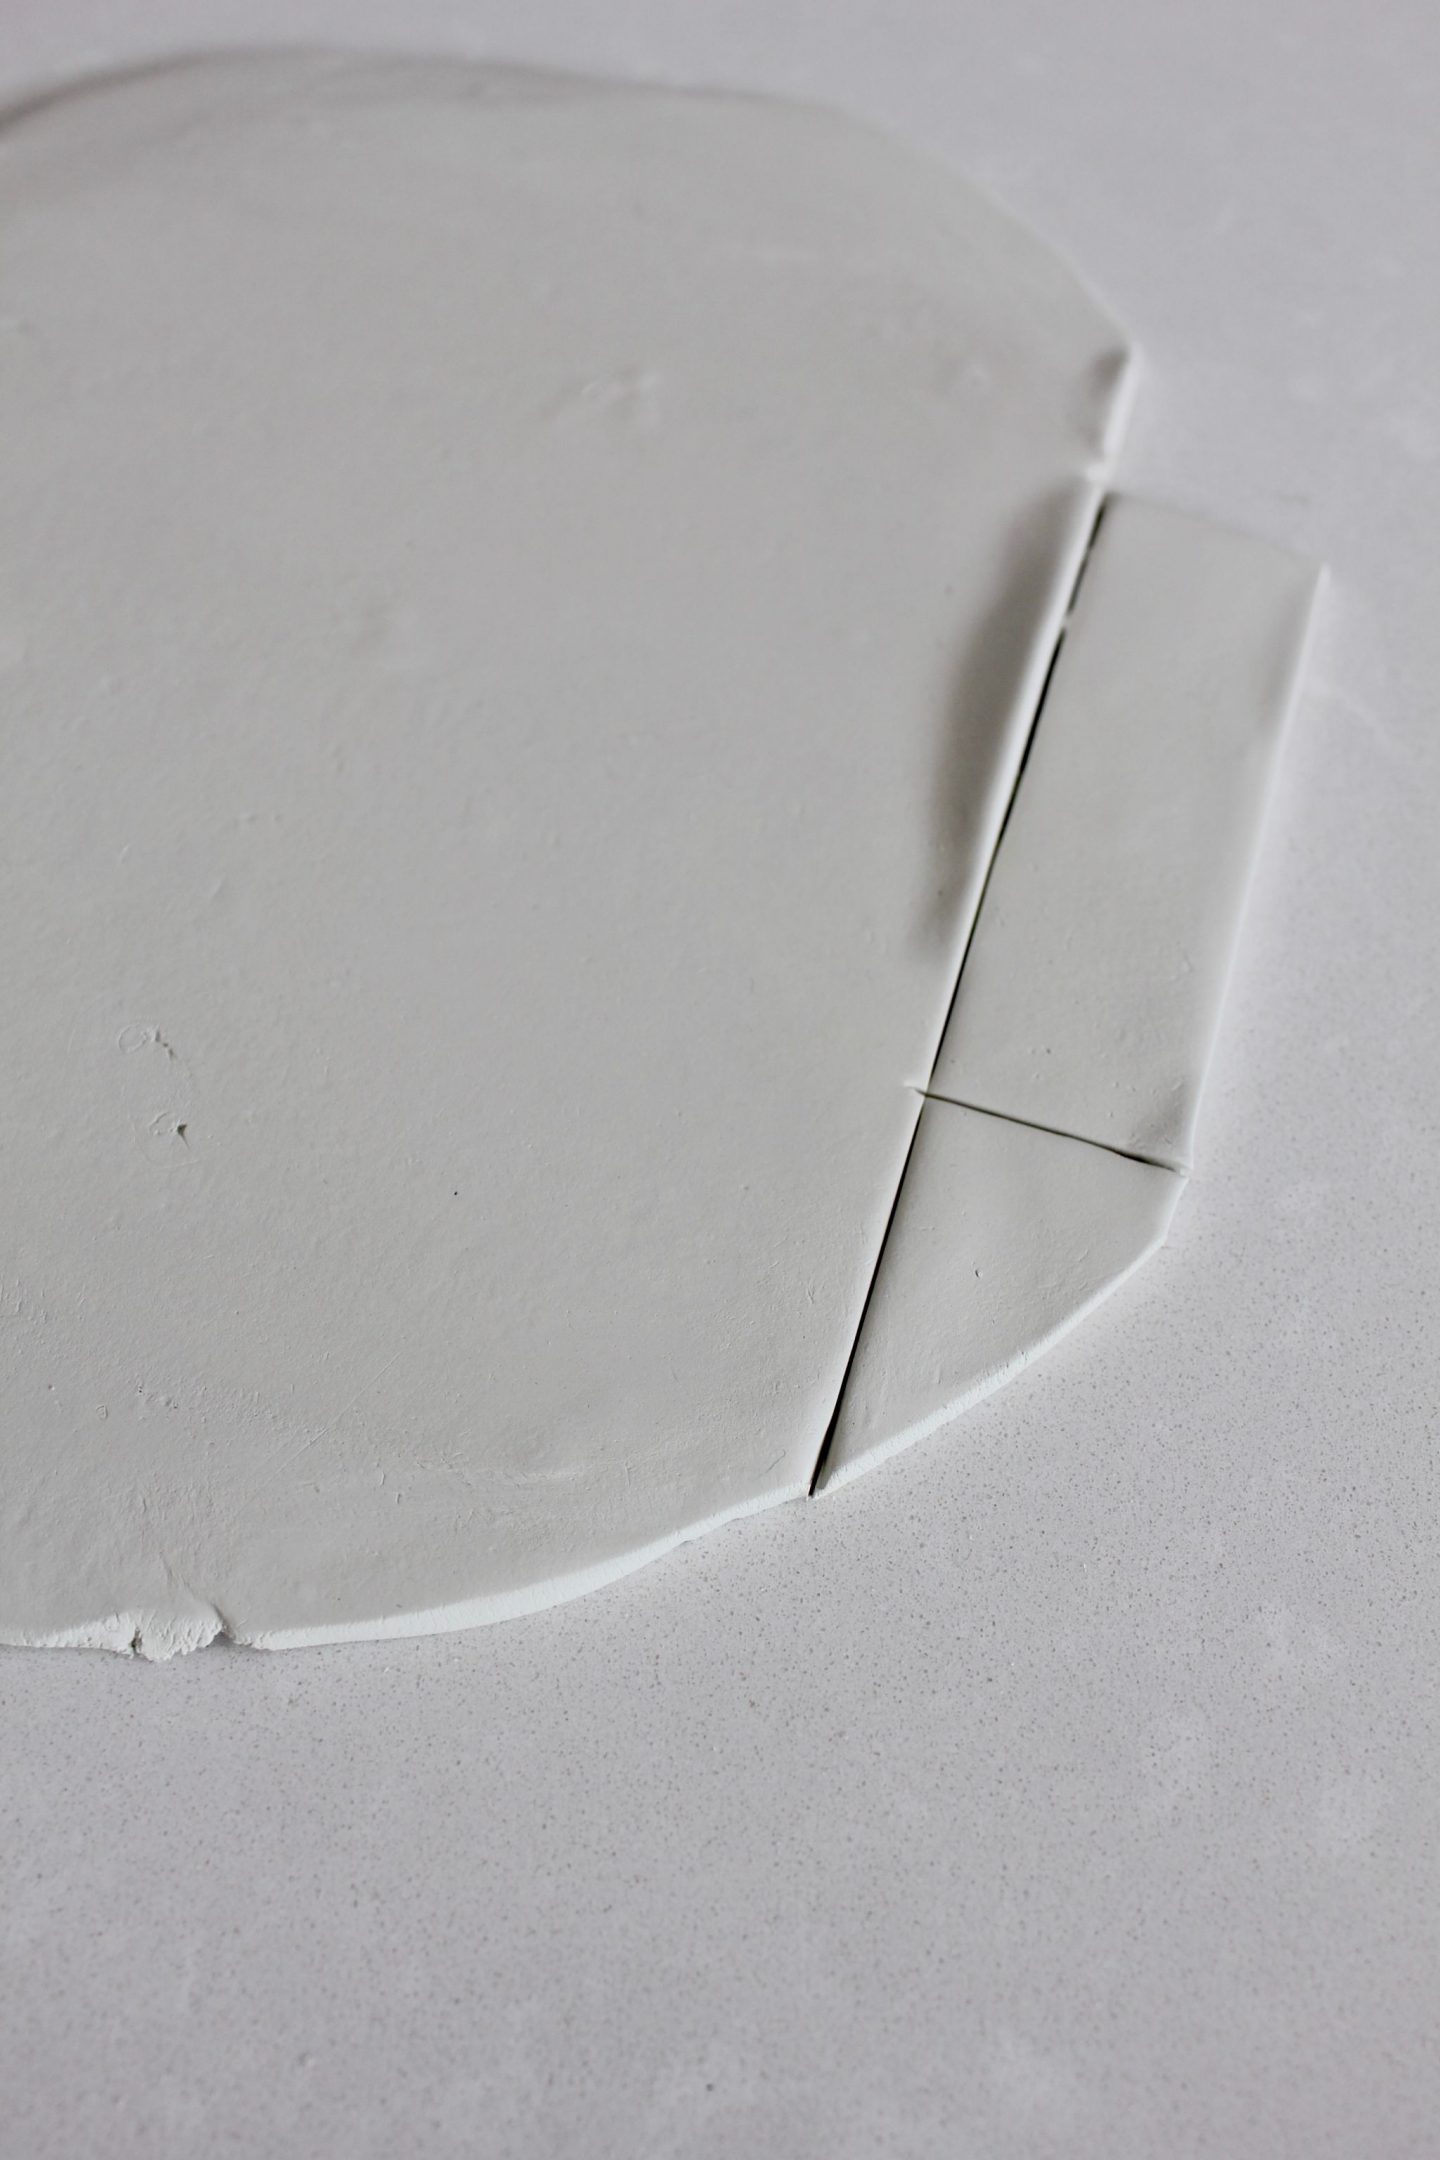
With your tags cut out, lift them carefully and place them on to your marble board. Do not use a wooden board as the grains may leave marks into your clay. You will most likely need to roll your tags flat again and even up sharpen up the sides. Then, using your skewer. make a hole in the centre of one end. This hole needs to be large enough to fit your cord or ribbon through. Leave your tags to dry for 24hrs.
The next step is completely optional. I wanted my tags to be pure white in colour so used some matt white spray. Once sprayed, I left them to dry for a couple of hours.
Below shows the difference between a sprayed tagged and an unsprayed tagged. It really depends on what look you are after as to whether you spray them!
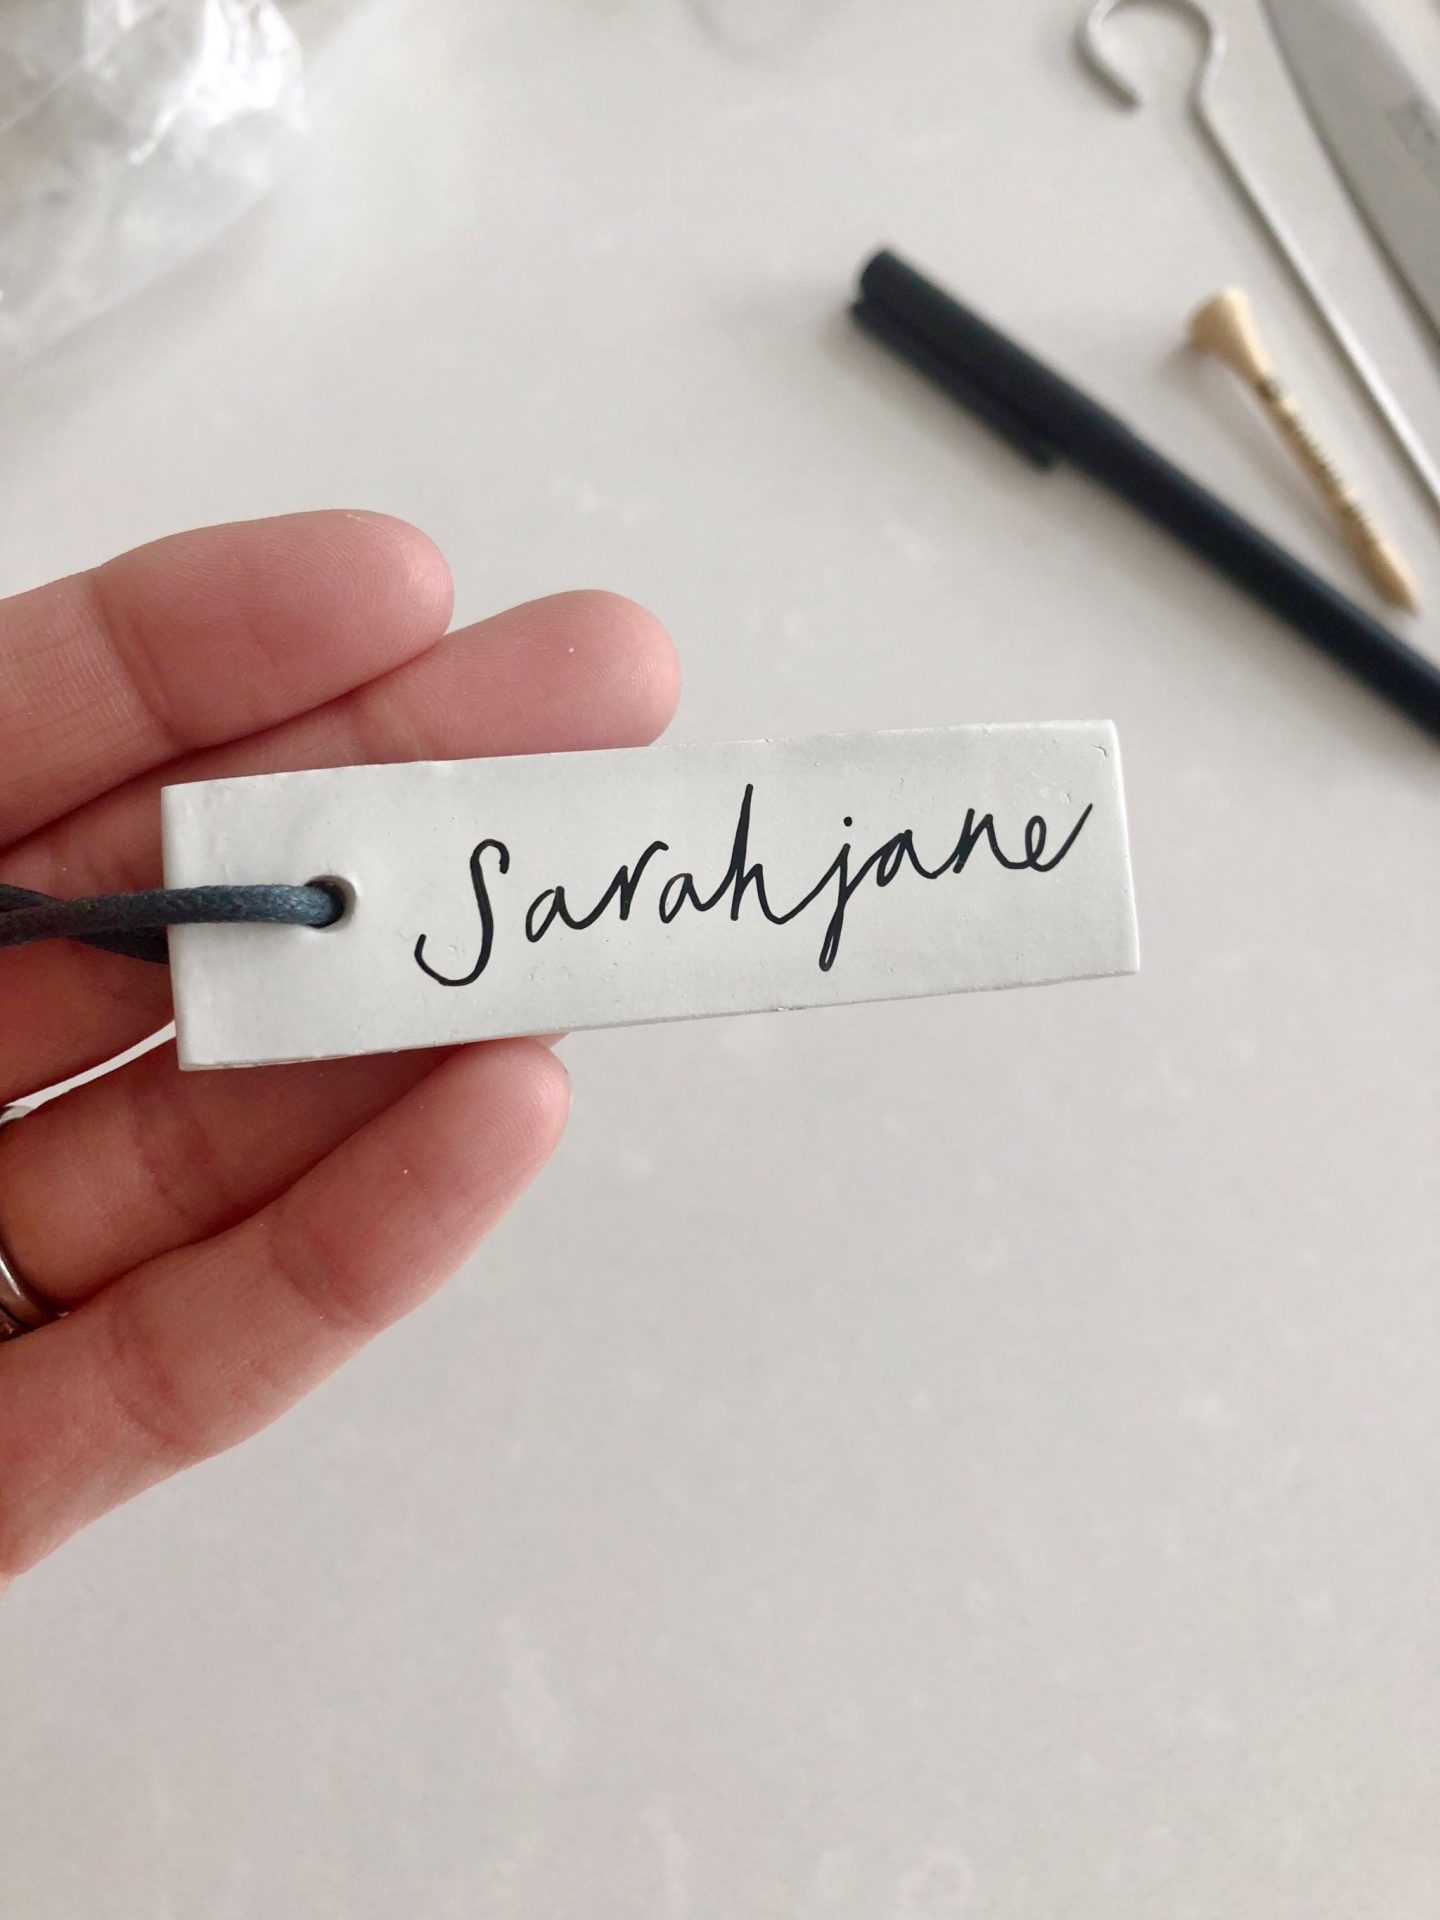
With your tags dry and ready to write on, you can either go completely freehand and write your names straight ‘off the cuff’ or have a bit of help…
I used a website called Font Space to help me with my writing – I am no calligrapher so I needed all the help I could get! This website allows you to browse through thousands of different fonts and even view a preview of your place setting name in different fonts. The font I used was Sweet Patterson, click here to view it.
I picked up these black fine liners to write my name tags in.
Spray your written tags with the craft seal. This will seal the writing and give the tags a lovely sheen finish. Finally, thread your cord, or ribbon, through the hole on each tag and tie a little knot.
So there you have it, a luggage-style personalised place setting…!
Thanks for reading!
